
Last Updated: September 29, 2026



What is the Health Check?
The Health Check is a dashboard tile that can be activated at the lowest outlet levels to display information for:
- Surface and direct users to what jobs need completion in the period to enable accurate cost of goods valuation.
- How the current cost of goods valuation is currently tracking in the period.
- Provide simple high level COGS comparisons to previous periods from the dashboard.
Please note: This feature is currently only designed to work at lower level outlets.
Setting Up the Health Check
To ensure the Health Check provides accurate and meaningful insights, it first needs to understand how your venue operates. During setup, you'll be asked to configure:
- Your venue's stocktaking frequency (reporting period)
- The features you use
- How often those features are expected to be used
The Health Check feature is turned off by default and must be configured before it can begin monitoring activity.
If you have the required permissions, you'll see a notification tile on your dashboard prompting you to set up the Health Check. Simply follow the setup process to get started.
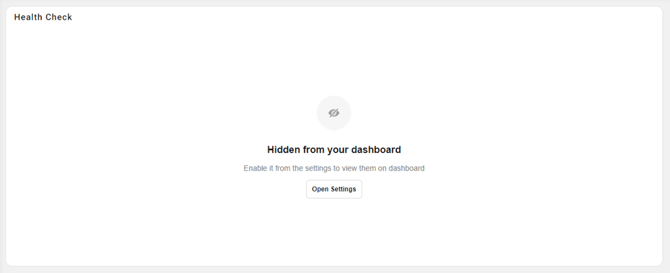
Select Open Settings to go directly to the Health Check settings page, where you can configure and manage this feature.
You can also access these settings at any time by navigating to:
Admin → Settings → Health Check.
Enable the Dashboard Tile
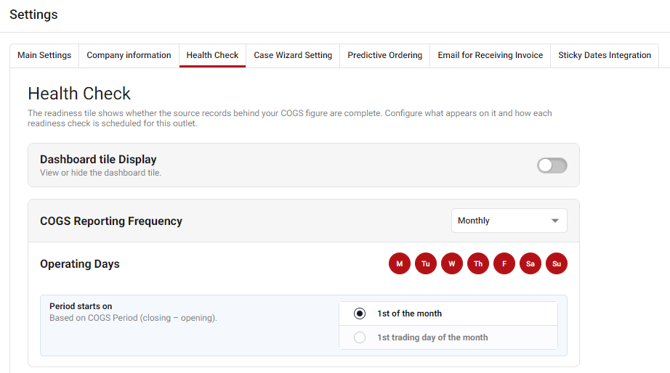
To make the Health Check visible to all users, first enable the Dashboard Tile Display option by using the Toggle in the settings - Dashboard Tile Display
Set Your COGS Reporting Frequency
Next, choose your COGS Reporting Frequency. This should match how often your venue completes its regular stocktakes.
Available options include:
- Weekly - Select a day of the week.
- Fortnightly - Select a start date.
- 28 Days - Select a start date.
- Monthly - Choose either the 1st of the month or the 1st trading day of the month.
- 4 / 4 / 5 - Select a start date.
Note: If using a 4 / 4 / 5 reporting cycle, select the start date of the first "4" week period. Health Check will automatically manage the cycle and reporting periods from there.
Most reporting frequencies require a starting date to establish the reporting schedule. Weekly and monthly frequencies provide additional options based on the selected period type.
Configure Operating Days
Health Check uses your venue's operating days to determine when records should be entered and maintained.
By default, all days of the week are selected. If your business is typically closed on certain days, simply deselect those days.
For example, if your venue does not operate on Mondays and Tuesdays, you can exclude those days from tracking expectations.
Data Tracking Configuration
Once your reporting frequency and operating days are configured, you can set up Data Tracking Configuration.
Tracked items are displayed within Health Check and provide a clear indication of whether your records are up to date. If something requires attention, you can access the relevant area directly from the Health Check dashboard.
There are four types of indicators used throughout Health Check.
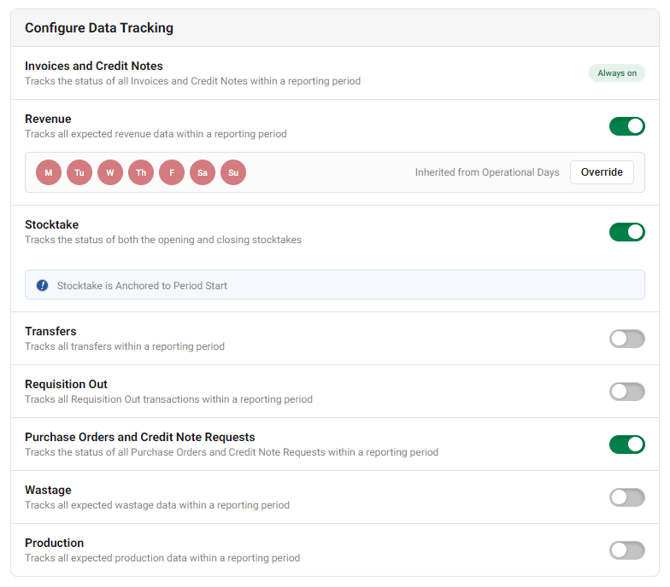
1. Checkmark Indicators
Checkmark indicators track activities that have a defined completion point and can be:
- Upcoming
- Completed
- Missing
Tracked item:
- Stocktakes - Monitored based on your configured COGS Reporting Frequency and reporting periods.

2. Ad Hoc Incremental Indicators
These indicators track records that are created as needed throughout a reporting period. The expected volume can vary depending on venue activity.
Tracked items:
- Invoices & Credit Notes
- Transfers
- Requisition Out
As records are processed, the indicator updates to reflect progress throughout the reporting period.

3. Operational Cadence Indicators
Operational cadence indicators track records that are expected to be entered regularly based on your venue's operating schedule.
Tracked items:
- Revenue
- Production
- Wastage
By default, these indicators use the operating days configured during setup.
 If a specific indicator requires a different schedule, select Override to customise the expected operating days for that activity.
 To revert back to the venue-wide operating schedule, select Use Operational Days.
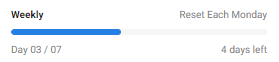 As the reporting period progresses, Health Check automatically increases the expected number of records based on the configured operating schedule.
4. Problem Indicators
Problem indicators highlight known issues that require review or action. These indicators only appear when an issue exists.
Tracked items:
- Purchase Orders & Credit Note Requests - Displays the number of unlinked purchase orders or credit note requests that remain in Receiving Orders during the current reporting period.
These indicators help identify outstanding actions and ensure records remain accurate and up to date.

For information on understanding the Health Check Dashboard tile check out our help article: Understanding the Health Check Dashboard