


About Receiving Invoices
After placing a Purchase Order with your Supplier, should a PDF Invoice be sent to your Email for Receiving Invoices, you will be able to match it against your order to help compare the invoice against what was initially requested.
Receiving an invoice involves matching the invoice to an outstanding Purchase Order (if applicable), marking the stock as received, comparing the final total and approving any changes in stock prices or variances in quantities ordered. Once an Invoice has been approved will it then move to your Invoice page.
Heads up! Invoices can now be auto-linked to your Purchase Orders if your Supplier has included your original Purchase Order number on their PDF invoice. Check out this news release for further details.
Linking a Purchase Order
Before processing an invoice, it's important to match it to any Purchase Orders that it may relate to. This reconciles your Purchase Order and removes it from your Receiving Order page.
From the navigation bar, expand the Stock heading and open the Receiving Order page:

Here you will find a list of your outstanding Purchase Orders and any documents that have been sent to your custom email address from your Suppliers or other merchants.
Locate the PDF Invoice you wish to process and double-click it to open the Link Invoice to Purchase Order window (or select it and click Process Order):

Locate the Purchase Order the invoice relates to by reviewing the details of your orders and comparing it to the invoice as shown on the right. If required, change the Date Range provided to search for orders that fall outside the default date window:

Once you've found the related Purchase Order, select it and click the Link To Purchase Order button to proceed.
Tip: You are able to select multiple Purchase Orders if the invoice noted relates to several orders you have placed. Simply tick the applicable Purchase Orders and confirm the action to merge when prompted.
If the invoice you intend to process does not have a related Purchase Order, simply click No Match Order instead. From here, processing an Invoice without linking to a Purchase Order follows the same steps. However, if you'd like to see it in action check out the full video guide here:
If the invoice you have opened includes new stock items for your review, please continue to the Processing new stock items section of this article. Otherwise, feel free to skip ahead to Checking and Parking stock.
Processing New Stock Items
On occasion, you may find that your invoice contains stock items that do not yet exist in your database. Similarly, if your invoice does not include Stock Codes or if your Description for an item doesn't exactly match how it has been invoiced, you may be prompted to action these items via the Stock Pending Request window:

This window allows you to conveniently Add ![]() new items to your database, or otherwise Link
new items to your database, or otherwise Link ![]() them to an existing stock item. You are also able to Allocate
them to an existing stock item. You are also able to Allocate ![]() them to another Outlet.
them to another Outlet.
The first action you can perform is to click Link to determine whether the stock item exists within your database. A search will automatically be performed to locate any similar stock:
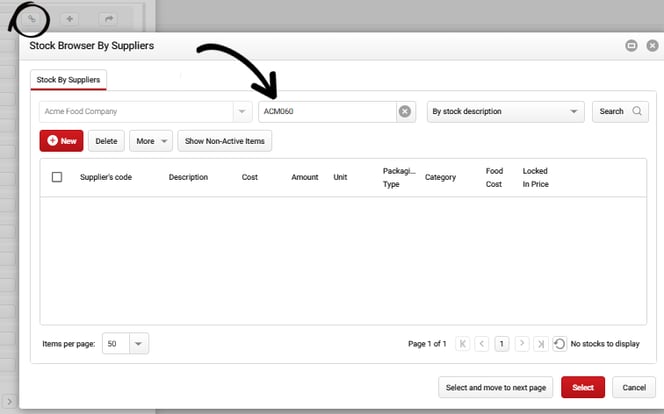
If you've found a matching stock item, tick it and click Select to perform the link. Once linked, any invoices that contain the same details for that item will now be automatically associated with the linked stock item in your account.
Caution: Avoid incorrect linking to keep your inventory data accurate. Always confirm that the invoice item and the existing stock item are actually the same before linking them. Even if descriptions are similar, different supplier codes often indicate a distinct product. If you are unsure, it is safer to create a new item than to link to an incorrect one!
If you wish to link it to a Base Product then click the ![]() button under the Base Product Link heading and Select a Base Product from the list:
button under the Base Product Link heading and Select a Base Product from the list:

If you can't see the Base Product Link column or would like to learn more about Base Products then check out the Base Product help guide for answers.
Next click Add to create a new entry for that item in your database:
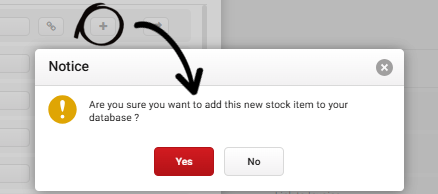
Click Yes at the prompt to confirm your action and add the stock item to your database. The item will then be removed from the list of stock pending your attention.
Once you have either Linked or Added any noted stock items, you will then be able to move on to Checking and Parking stock.
Note: To process supplier invoices without adding non-inventory lines to your stocklist, follow the steps in the following guide:
Checking and Parking stock
The Invoice Detail window will now be displayed. This provides you with an overview of how the information of your PDF invoice was extracted and allows you to Check or Park stock items that were physically received:

Before taking a closer look at the stock items shown, first review the Invoice Date, Invoice Number, and the Total from Invoice at the top of the window to ensure they are correct. Compare these details to the PDF invoice shown on the right. Look good? Great! Let's move on to reviewing your stock items and marking them as received so we can finalise your invoice.
Compare each stock item on the left to the line items that appear within your PDF invoice on the right. Ensure that all values match, including the Quantity, Cost, Tax and any Discounts applied to a specific item.
Please Note: When a readable PDF invoice is received by our system, we will do our best to extract and match the contents of your invoice. If you notice any discrepancies with the information that was extracted from your Invoice, please correct the data recorded and click Report Extraction Issues (located under the PDF invoice window on the right) to advise us to review our extraction template.
Once you've confirmed the details of each line item, either Check or Park the stock item. What's the difference? Well if an item has been physically received, click Check, otherwise if the stock item is being delivered later, click Park (note that if you Park any items, you will not be able to finalise the invoice as you must wait for the stock to arrive and change its status to Checked):
Tip: You can click the All Goods Received checkbox to automatically Check all line items from your invoice.

Almost there! All we need to do now is confirm the Invoice Total with the Total from Invoice. This final step allows us to determine if there's any inconsistency with what the invoice requires you to pay against the sum of each line item's sub-total.
Check the values in both fields to ensure they match. If there's a slight variance, then you may need to note a Discount / Adjustment in the field provided to accommodate rounding issues. Our system will do this automatically if it has detected the need for rounding to ensure these totals match without your intervention.
Go ahead and click Save then proceed to the next section to see how your invoice and Purchase Oder compare!
Comparing Your Invoice and Purchase Order
Alright, here's where the magic happens. If you've linked your invoice to an existing Purchase Order, the Compare Order window will now be displayed:

This window allows you to review the contents of your order against what was invoiced. Any variances in Unit Price, Quantity Ordered and whether certain items were added or excluded from your invoice will be highlighted for your review.
Please Note: If you ended up clicking No Match Order, the Compare Expected Cost window will instead be displayed. This window is very similar, however instead of comparing your invoice to a specific Purchase Order, it will instead compare the Unit Price of each item that was invoiced.
If you've found any discrepancies that requires a Credit Note (such as if you've been overcharged for a Stock Item or was invoiced for an item that was not ordered), use the Proposed Action field to select a Credit Note Option.
When clicking Approve, you will then be asked whether you would like to submit a Credit Note request for the noted item. Follow the prompts provided to continue to request your Credit Note if desired.
Once you receive the Credit Note back from the Supplier in your Receiving Orders page and you are Checking each of your items in the Credit Note, you will also have to choose whether they were Returned Goods. If you returned the physical item to the Supplier when you submitted your Credit Note then make sure to tick Returned Goods. However, if the item never arrived and you simply received compensation via a Credit to your account then leave this box unticked. This will ensure your Theoretical Stock on Hand reports are accurate.

Alternatively if no credit is required and you agree to the changes shown on this window, click Approve to finalise your invoice.