


Manually entering an Invoice
Recording your Invoices digitally is crucial to help determine the amount you spend per Supplier, changes in stock prices, calculating your food/beverage costs and more.
These insights rely heavily on accurate and timely recording of your Invoices. This article is here to help you get started with how this can be achieved so you can get the full picture!
Please Note: This article covers how to manually enter an Invoice, as opposed to processing an Invoice from the Receiving Order page. See Receiving an Invoice for further details on this separate process.
From the navigation bar, expand the Stock heading and open the Invoice page:
 Click New to create an Invoice, however be sure to search for the Invoice Number you are about to enter in the field provided, just to be sure it hasn't been entered already.
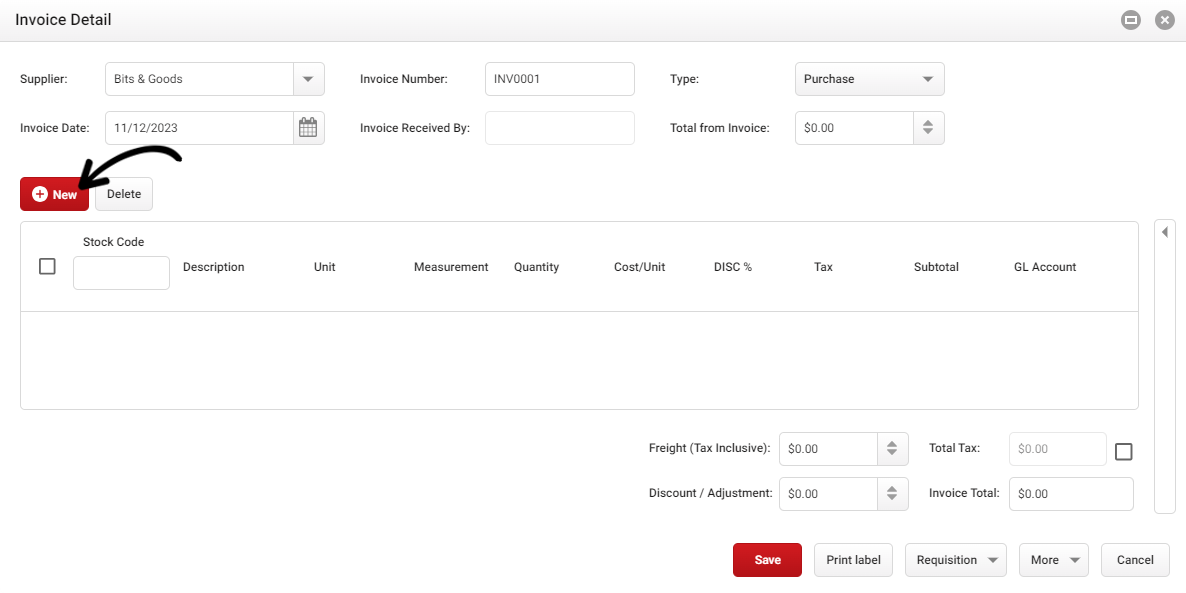
The Invoice Detail window will then be displayed. A great way to get started is by setting each of the fields at the top of the window before you begin adding stock items. Here's a quick rundown on what each field relates to:
- Supplier: This is the merchant who sent you the invoice. Select the Supplier from the drop-down list provided, however if it doesn't yet exist, see Creating a Supplier for assistance.
- Invoice Date: This is the date shown on the invoice you are about to process. Not to be confused with the Delivery Date shown on your merchant's document.
- Invoice Number: The particular document number shown on the Invoice you wish to input. The system will check whether this number has already been entered on a different Invoice, so ensure this value is exact as to prevent accidentally entering the same Invoice twice!
- Invoice Received By: This field will populate automatically with the first and last name associated with your account.
- Type: Set to Purchase by default, change this to Return if you are processing a Credit Note instead. When set to Return, all values are assumed to be negative.
- Total from Invoice: The final amount due to be paid as shown on your Invoice. When you begin adding stock items to your Invoice, the system will match the subtotal of each line item to this total.
Once you've entered each of the top fields, go ahead and click New to begin adding the individual line items as shown on the Invoice:
Click image to enlargeThe Stock Browser window will then be displayed. Search for the stock you need to add using the fields provided, or click Add to enter any new stock (see our Adding Stock article for further assistance with creating new stock items if required):

Click image to enlarge Use the checkboxes to select each stock item shown on your Invoice. When ready, click Select to add them to your Invoice.
With your line items now added, you can begin to set the Quantity and Cost of each item as shown on your Invoice, as well as any applicable Discount that may have been given for any particular item:
Please Note: Be sure to enter the exact Quantity shown as per your Invoice. If you received a different amount than what is written, be sure to request a Credit Note from your Supplier.
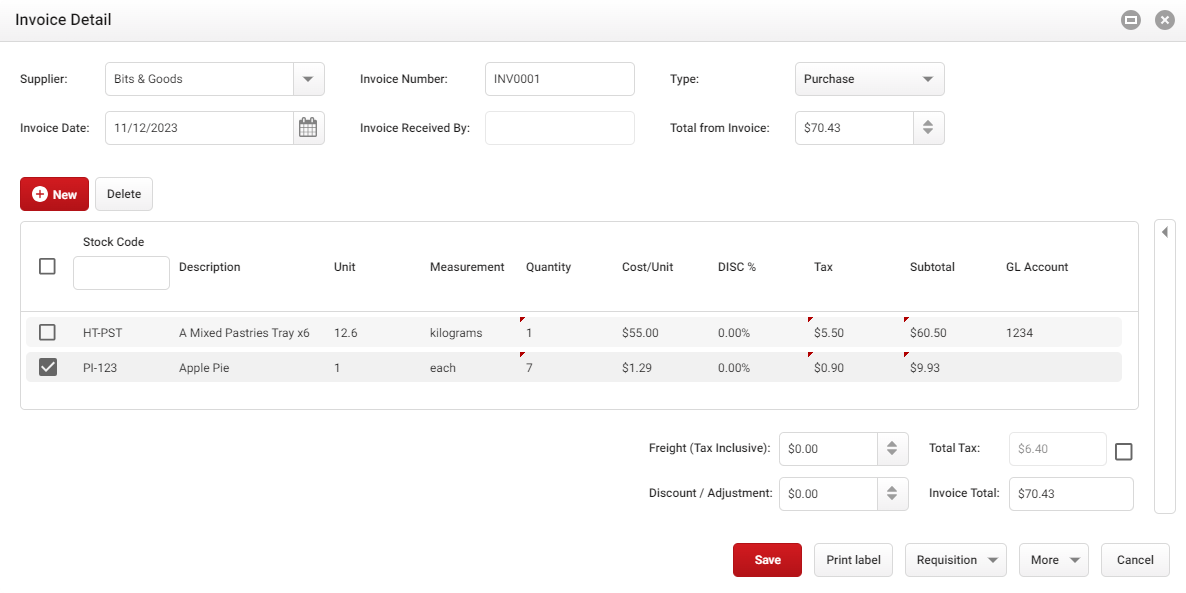
The Tax column will automatically calculate for any items that have the Tax field ticked. You can always edit this manually if desired.
Last but not least, we need to ensure our Invoice Total and the Total from Invoice we set earlier both match. The purpose of this step is to find any discrepancy between the amount you have been invoiced and the total sum of each line item.
If everything matches, go ahead and click Save to finalise your Invoice.
Uploading an attachment
It's always helpful to have a digital copy of the physical Invoice received available for your records. Provided you've scanned this Invoice and have it readily available in a PDF format, you can upload it to your completed Invoice.
From the Invoice page, locate the Invoice you wish to upload an attachment for and click the Upload button:
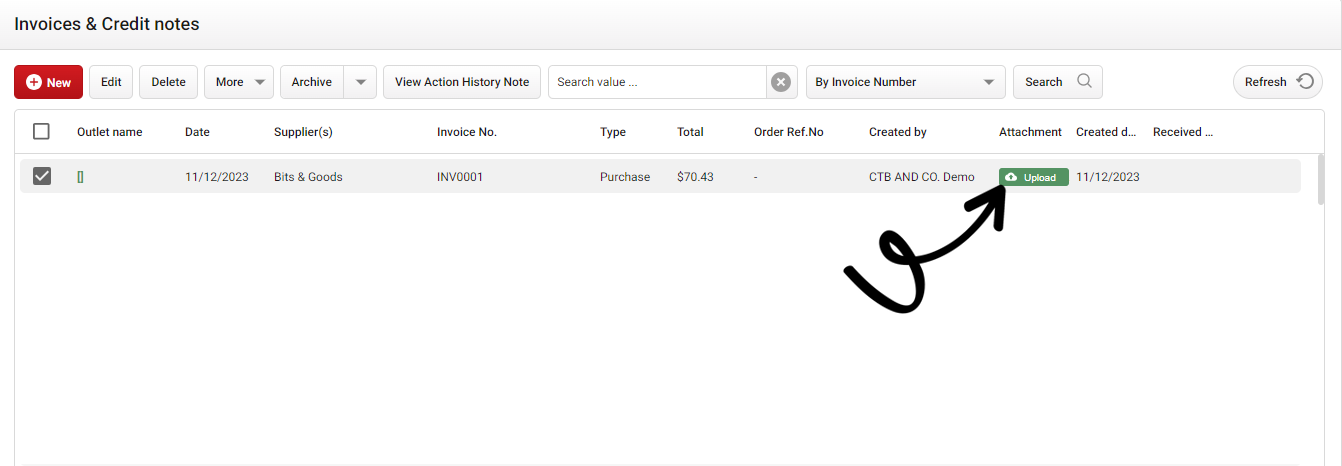
Click image to enlarge
If you have a local copy of the Invoice saved, click Upload a File then select the file you wish to attach. Alternatively, you can always click Select from Invoice History if the file was sent to your custom Email for Receiving Invoices. Just search for and select the file using the date range settings provided.
Once selected, your attachment will now be saved to the selected Invoice and can be viewed at any time.
Adding and reviewing notes
As you process a new Invoice, system notes will be automatically assigned to the Invoice for later review. Users can also add their own custom notes to an Invoice for the reference of others, which are entered by clicking the Action History Note button:
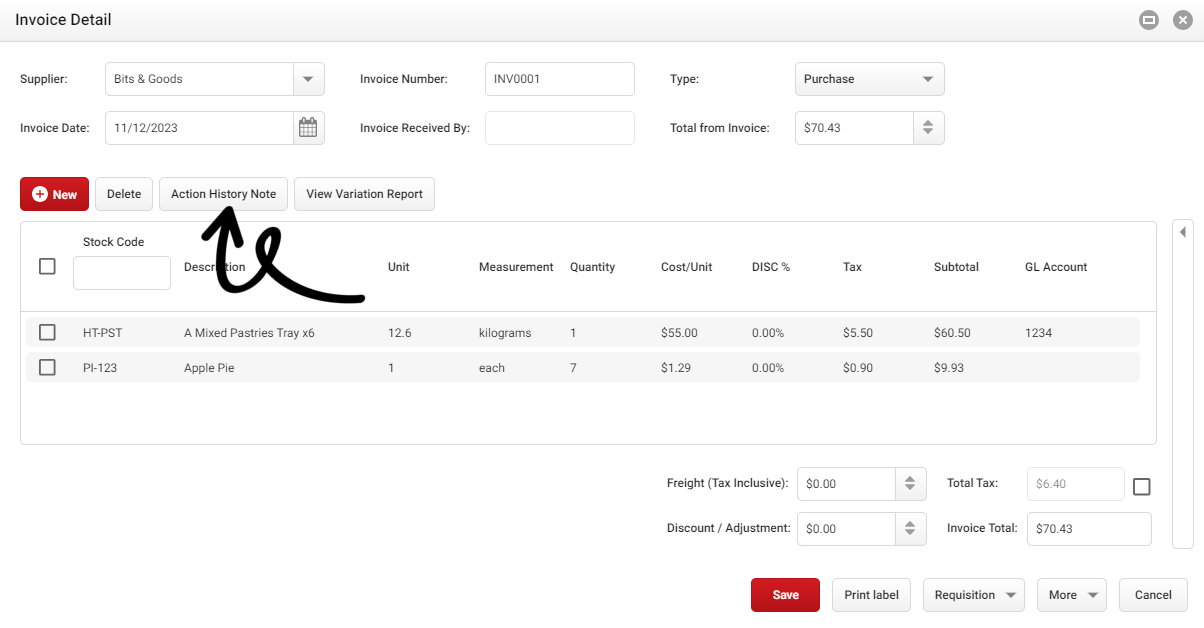
Click image to enlarge
You can also find a similar button on the Invoice page directly. Just click the Invoice you wish to view notes for an click View Action History Note.
From here you can review and add your own notes to the Invoice. Just enter your desired note in the field provided and click Add Notes:

A timestamp will be recorded alongside each note, as well as the name of the user associated with it.