Last Updated: October 1, 2024


About Stocktake Templates
Stocktake Templates allow you to customise the stock items that appear within a Stocktake for convenient entry. They also provide you with a total valuation of the stock items tallied under that Template.
Your Templates can be set up in a variety of ways depending on your needs; suppose you want a Template for each location you store stock like the Fridge, Freezer or Pantry, or perhaps separate them by Category. It's entirely up to you how you would like to organise your digital inventory, and this article is here to help you get started with building and managing your Templates.
Creating a new Template
To create a new Stocktake Template, navigate to the Stock heading and select Stocktake:
 From here, click the Stocktake Templates button on the far-right to expand the Templates drawer. From here you can create and manage your Stocktake Templates as desired:
 Go ahead and click New to get started. You will then be prompted with the Create New Template window:

Begin by entering your desired Template Name in the field provided, noting that the Created Date will automatically be set as today's date. Let's then quickly talk about Dynamic Templates.
When creating a new Stocktake Template, you have the option of setting whether it is a Dynamic Template. This allows you to count stock under a Template without limiting the list of available stock items. When you add a Dynamic Template to a Stocktake, the Template will include all of your usual stock items. Ticking this box will immediately create the template, as it cannot be customised further.
Whether you're creating a Dynamic Template or not, click Save to create your new Template. If you're creating a standard Stocktake Template, you will then be able to customise it using the Template Builder:

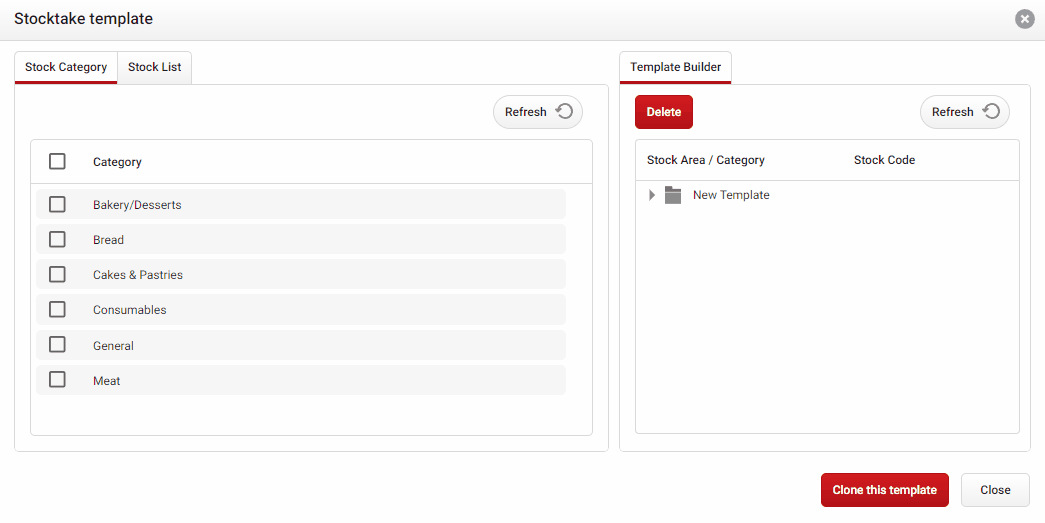
This is where you can add the Categories and stock items that you want to include in your Template. Begin by clicking and dragging a Category to the right side, dropping it under the name of your Template:
Click image to enlarge
Continue to add as many Categories as you need to your Template. Then when ready, move to the Stock List tab to select your individual stock items.
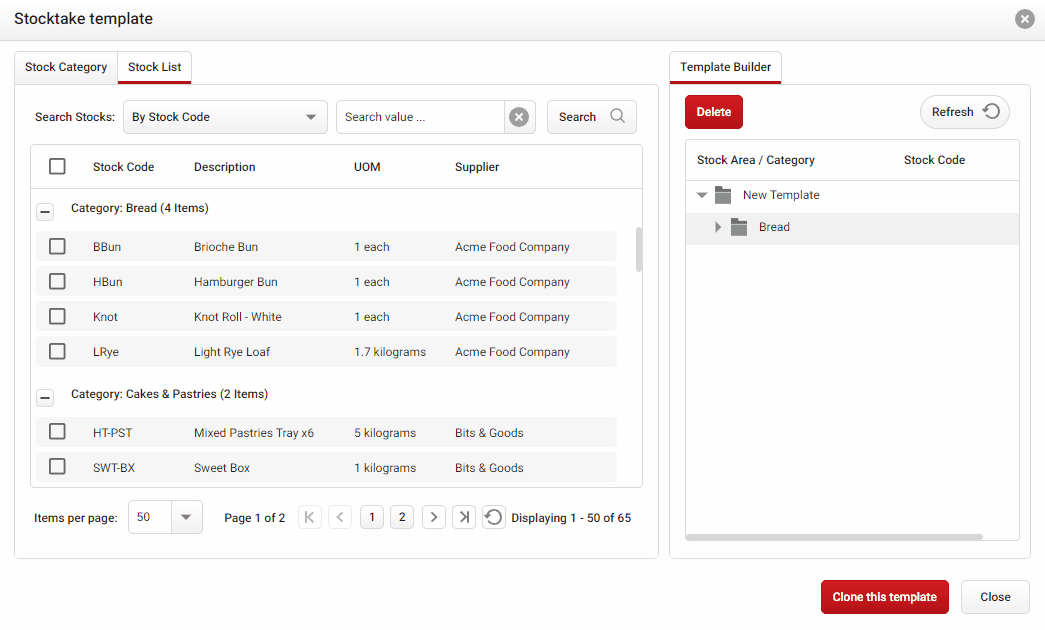
Here you may search for and select any stock items you want to be shown under your Template. Similarly to your Categories, click and drag any desired stock items under the Categories folders on the right:
Tip: You can also click the Category Folder to automatically filter your Stock List to show any stocks that are assigned to that Category.
Click image to enlarge
When you're done, just close the window to finish, as your progress is automatically saved as you go!
Deleting a Template
To remove an existing Stocktake Template, simply open the Stocktake Templates drawer and select the Template you wish to remove. Click the Delete button and confirm to remove the Template as desired.
Please Note: Once a Stocktake Template has been deleted, it cannot be recovered! However, the deleted Template will still remain on any existing Stocktakes it was applied to.